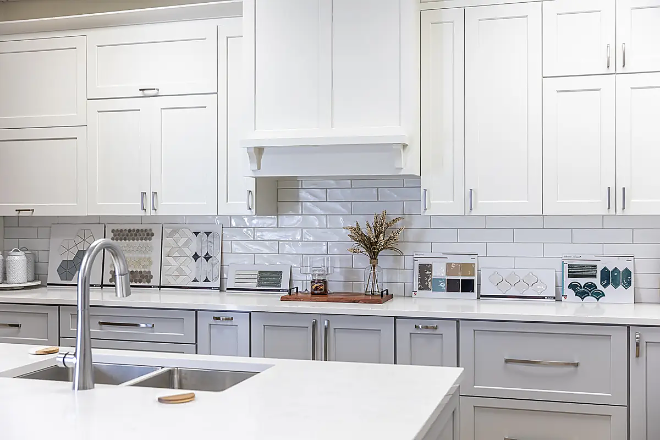
Splash Some Style: Your Guide to a Backsplash That Pops Without Breaking the Bank
Ever stared at the blank wall behind your stove and wondered what it would take to turn it into the star of your kitchen? Or felt stuck between a tile you love and a price tag that makes you wince?
In this guide, you’ll learn the most popular kitchen backsplash ideas, what each one really costs, and how to plan a backsplash that fits inside a full kitchen remodel budget.
By the end, you’ll know exactly how to choose a backsplash that looks like your dream kitchen and lands within a budget you can actually live with.
How Much Does a Kitchen Backsplash Cost?
A kitchen backsplash costs between $60 and $400, depending on the tile you choose, for a standard 20-square-foot run.
Subway tile runs about $2 to $4 per square foot.
Large format tile runs $4 to $8 per square foot.
Natural stone and handmade tile run $8 to $20 per square foot or more.
Most homeowners also spend $100 to $200 on grout, sealer, and caulk, with extra labor for fancier patterns like herringbone.
Riverbend Kitchens includes a full backsplash in our Deluxe Kitchen Remodel, starting at $55,000, and our Premium Kitchen Remodel, starting at $85,000. Our Standard Kitchen Remodel, starting at $35,000, does not include a backsplash, with timelines running 8 weeks for Standard, 8 to 10 weeks for Deluxe, and 10 to 12 weeks for Premium.
Kitchen Backsplash Ideas, Ranked by Cost and Visual Impact
Backsplash ideas range widely in price and style, so it helps to look at them from the cheapest to the splurge.
That way, you can scan straight to the budget tier that fits your kitchen project.
Every option below works in a variety of styles, from modern to traditional to farmhouse.
The right pick comes down to your budget, your cabinets, and how much of a focal point you want the backsplash to be.
Classic Subway Tile, the One That Never Fails
Classic subway tiles are the most popular kitchen backsplash on the planet, and for good reason.
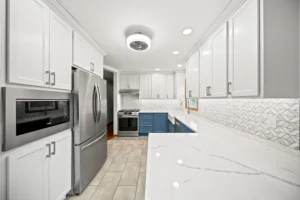
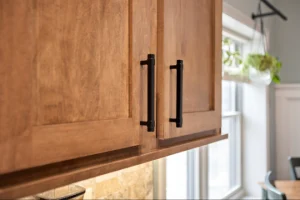
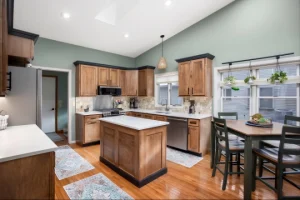
They work with almost any style of cabinetry, from white cabinets to natural wood to navy and other kitchen cabinet colors.
The clean lines reflect light beautifully, giving you a timeless, polished look without a hefty price tag.
White subway tile runs about $2 to $4 per square foot, so a 20-square-foot backsplash is roughly $60 in materials before grout.
You can easily update the look by:
- Changing your grout color to a dark shade for a moodier vibe.
- Going larger with 4-inch by 12-inch tile for a more modern feel.
- Mixing matte and glossy finishes to introduce texture.
Add 10 percent overage when you order so you don’t run short mid-installation.
You’ll see subway tile pop up in remodels across the Quad Cities, in homes throughout Coal Valley, Bettendorf, and Moline.
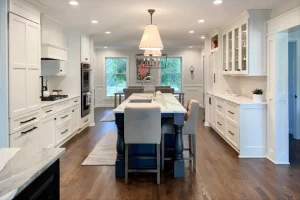
Riverbend Kitchens features geometric subway tile backsplashes throughout our design portfolio, paired with premium materials such as quartz, granite, and butcher-block countertops. We install subway tile alongside the cabinet styles our clients choose most, including Shaker, flat panel, and glass-front cabinetry in wood stain, white, navy, and grey finishes.
Straight Stack Pattern, Clean and Underrated
A straight stack uses the same subway tile but lines it up in straight rows and columns rather than offsetting each row.
The result is minimal, geometric, and calm.
It’s a strong choice for modern or Scandinavian-inspired kitchens where you want the cabinetry and countertops to be the star.
Straight stack also installs faster than offset patterns, potentially lowering labor costs.
Add 10 percent overage.
If you love a clean, seamless look and you’re working with a tight budget, this tile pattern is the move.
Mosaic Tile Sheets, the Budget Secret
Mosaic tile is one of the best-kept secrets in kitchen backsplash design.
Small tiles, often 1 inch by 1 inch or smaller, come pre-mounted on mesh backing sheets.
You install the whole sheet at once, so you get all the visual complexity of intricate patterns without paying for the labor of placing each tile by hand.
Mosaic tile works best as a feature behind the range or stove rather than across the entire wall.
That way, you create a focal point without blowing your budget.
Add 10 to 12 percent overage.
Look for mosaic tile in projects across Davenport and Rock Island.
Riverbend Kitchens features mosaic tile backsplashes in our design portfolio alongside geometric subway tile. We pair mosaic backsplashes with the premium materials our remodels are built on, including quartz, granite, and butcher-block countertops.
Large Format Tile, the Modern Minimalist
Large-format tile means anything 12 inches by 24 inches or larger.
You get a seamless, high-end appearance with fewer grout lines and way less visual clutter.
Cleaning is easier, too, since there are fewer joints to scrub.
The tradeoffs are that large tiles require more precise installation because they’re less forgiving of bumpy walls, and they cost more per square foot.
Large format tile runs $4 to $8 per square foot, and you should add 12 to 15 percent overage.
This style pairs naturally with flat-panel cabinets, quartz countertops, and modern open-plan kitchens.
Running Bond, the Subtle Upgrade
Running bond is a standard subway tile installed in a brick offset pattern rather than stacked straight.
It’s the same tile but with each row shifted halfway, giving you a more intentional, designer-y feel without changing the material.
A running bond usually adds $100 to $200 in labor costs compared to a straight stack.
Add 10 to 15 percent overage.
If you’re picking between straight stack and running bond, and your budget allows, running bond almost always wins on visual impact.
Two-Tone or Mixed Tile, Where Personality Comes In
Two-tone backsplashes combine two complementary tiles to let you show off some personality without overwhelming the space.
The smart budget move is to use an affordable base tile for 80 percent of the area and splurge on a statement tile for the remaining 20 percent.
A classic combination is a white subway base with a marble subway tile or zellige accent strip behind the stove.
You get the dramatic effect of a premium tile without the full cost of covering every wall.
Add 12 to 15 percent overage.
This approach works beautifully with white cabinetry, natural wood, and quartz countertops, where you want the backsplash to bring in a pop of color or texture.
Herringbone, the Investment Focal Point
Herringbone tile is gorgeous.
Diagonally interlocking tiles create movement, depth, and drama that photographs beautifully and never really goes out of style.
The catch is that herringbone requires more cuts, more waste, and more skilled installation.
Use herringbone as a feature area behind the range rather than your entire backsplash.
You’re looking at about 10 square feet of tile with 18 to 20 percent overage, plus $300 to $500 in additional installation labor for that range area.
Wall to wall, the cost adds up fast.
As a focal point, it’s manageable and absolutely worth it.
Natural Stone or Zellige, the Splurge That Pays Off
Natural stone backsplash tiles include marble, slate, travertine, and handmade ceramics like zellige.
The variation is the whole point.
No two tiles are exactly alike, so your kitchen ends up with character that no factory tile can match.
Natural stone runs $8 to $20 per square foot, so a full 20-square-foot backsplash will cost $160 to $400 in materials alone.
Most natural stone requires sealing to stay protected from stains and moisture.
Add 20 percent or more overage, always.
If this is your one splurge in a dream kitchen, a marble slab or zellige backsplash makes the whole space feel like it was designed by someone with serious taste.
How to Budget for a Backsplash Inside a Full Kitchen Remodel
Most articles treat backsplash as if it were something you buy on its own.
In a real kitchen remodel, the backsplash is just one part of a much larger project that includes cabinets, countertops, flooring, and fixtures.
How much you’ll actually spend depends on the remodel tier you’re planning, not just the tile you pick.
That changes the math in a big way.
Backsplash Inside Riverbend’s Tiered Pricing
Each remodel tier handles the backsplash differently, and the rest of the scope shifts with it.
In the Standard tier, you’re working with 10 to 13 cabinets, low-level quartz or granite countertops, a small flooring area, and a new sink and faucet, and homeowners often handle the demo and paint work themselves.
The Deluxe tier covers 14 to 20 cabinets, quartz or granite countertops, a small flooring area, a new sink and faucet, and minor reconfiguration, like moving a dishwasher.
The Premium tier covers 20-plus cabinets, quartz or granite countertops, a small flooring area, a new sink and faucet, and major space reconfiguration.
Appliances are excluded from all three tiers.
Backsplash as Part of a Refresh, Not Just a Remodel
If you love your cabinet layout but want a unified, modern look, you don’t have to go through a full remodel to get there.
A backsplash can work alongside cabinet refacing in lieu of a full kitchen remodel, new quartz countertops, and updated plumbing fixtures to completely change how the kitchen feels.
A recent refacing project in East Moline paired a fresh backsplash with new quartz countertops and updated fixtures, totaling $38,757.
That’s a lot less than a full remodel, which would have run upward of $60,000 for that same kitchen.
The new backsplash pulled the countertops and cabinetry into a cohesive look, adding the kind of finished detail that makes a kitchen feel designed rather than thrown together.
The Overage Rule: Order More Tile Than You Think You Need
Running short on tile in the middle of installation is one of the most frustrating things that can happen on a kitchen project.
Your color could be backordered, discontinued, or come from a different dye lot that doesn’t match.
That’s why you always order with overage built into the count.
Here’s the quick reference for how much extra tile to add based on your pattern:
- Straight lay: add 10 percent.
- Running bond and offset patterns: add 10 to 15 percent.
- Herringbone and diagonal patterns: add 18 to 20 percent.
- Natural stone or handmade tile: add 20 percent or more.
- First-time DIY installer: add another 5 percent on top of whatever the pattern suggests.
Following this rule protects your timeline and keeps the finished backsplash looking like a cohesive piece rather than a patchwork.
Don’t Forget Grout, Sealer, and Caulk
Almost every homeowner underbudgets for grout, and it’s an easy fix.
Plan on $100 to $200 for grout, sealer, and caulk on a standard backsplash, no matter which tile you choose.
It’s not glamorous, but running out of grout at 10 p.m. during installation is its own special kind of frustrating.
A few things worth knowing about grout:
- Grout color completely changes the look of a backsplash, so pick it intentionally.
- Natural stone and handmade ceramic backsplashes need sealing to resist stains and moisture.
- Caulk goes at the seams where tile meets countertops, cabinets, and the ceiling for a clean, watertight finish.
A well-chosen grout color can either let the tile blend into a seamless wall or turn the grout lines themselves into part of the backsplash design.
Why a Backsplash Matters Beyond the Look
A kitchen backsplash does three jobs at once, and only one of them is decoration.
It protects the wall behind your stove and sinks from splatter, steam, and the daily chaos of cooking.
It visually pulls the room together by bridging the gap between your countertops and cabinets.
And it’s one of the few places in a kitchen where you can show off color, texture, and personality without overwhelming the whole space.
A backsplash also makes the kitchen easier to maintain over time.
Tile, glass, porcelain, and ceramic surfaces can be wiped clean with mild soap and a damp cloth.
You skip the constant repainting and touch-ups that bare drywall behind a busy stove demands.
Backsplashes prevent walls from staying wet, which keeps mold and mildew from forming in the first place.
High-end backsplashes in materials like marble, natural stone, glass, or metallic finishes also add real resale value.
Buyers in Quad Cities markets like Milan, Geneseo, and Eldridge are willing to pay more for kitchens with premium materials.
That’s the same reason backsplash is included in the higher remodel tiers.
It’s the details that make a finished kitchen feel intentional rather than assembled, and it’s one of the best moves you can make to complement the rest of your kitchen decor and flooring.
Grout Expectations Around Riverbend Kitchens
A great backsplash isn’t a tile pick; it’s a design decision that has to work with your cabinets, countertops, and overall budget tier.
Riverbend Kitchens includes the backsplash in the Deluxe and Premium remodel tiers and pairs it with cabinet refacing projects, so the wall behind your stove ties the rest of the kitchen together rather than fighting against it.
Ready to design a kitchen where the backsplash earns its spot on the wall?
Fill out our contact form today or give us a call.